For me this step is easy because I have a combi boiler, so my pressure gauge is on my boiler. For houses which don’t have a combi boiler the pressure gauge is usually situated in an airing cupboard where the stored hot water cylinder is.
As you can see the system pressure here is on zero. This is obviously not good and can cause problems with your circulating pump. It’s also be really inefficient to run.
You’ll notice that this pressure gauge has a green section indicating the ideal system pressure. Ideally you want the pressure to be between 1 and 1.5 when the system is cold. This gauge indicates that 1.5 to 2.5 is ideal but i’ll cover this later to explain why.
This particular step isn’t going to be relevant to you if you have gravity fed system. You should be able to tell this if you have plastic tanks in the loft/roof space. If you haven’t then read on.
Locating the filling loop for a boiler or heating system isn’t so obvious sometimes. here we have an image of a standard filling loop, which is fitted externally from the boiler. You’ll notice that it has 2 black levers (one isn’t so clear). These valves can be turned 90 degrees (usually anti clockwise) which will allow water to enter the heating system.
The pressure should increase, continue to fill the system until it reaches between 1 and 1.5. It’s very important that these valves are closed off completely. If they are not turned off completely, then water will continue to fill the system, which could lead to a failure in some of the systems components.
Its advised to remove the braided hose and cap the loop off to guarantee that no more water can enter the system. This filling loop has useful caps which can be hand tightened to create a water tight seal.
Now we have enough pressure in our system. We need to make sure that our radiators are full of water. It’s best to start from the bottom of the system and work your way up. Leaving air in your radiators can contribute towards corrosion so it’s best to keep an eye on this regularly.
If you don’t know how to bleed the air from the radiator don’t worry, all will be revealed. The image shows a bleed nipple which was hidden on the back of the radiator, these can be less obvious to find. If you can’t see one, keep looking. Every radiator has to have one, it will always be at the top of the radiator somewhere.
using a vent key to remove air from radiator is an important step to take before winter comes
Before you attempt this you’re going to need a vent key, which is shown in the image. You can pick these up from your local newsagents usually. Follow these simple steps to remove the air from your radiator so its ready for the winter.
Onto step 4….
Before we turn the boiler on it would be a good idea to test the heating controls. I can assume that you have a time controller, a room thermostat and thermostat radiator valves. There are many different types and brands of these controls so unfortunately I can’t cover all of the types but the following will be based on probably 90% of UK households at the moment. So if your heating system has a fancy control system and you’re unsure how to use it drop a comment in the box below and we’ll be happy to advise you.
The first step to this is to turn your time controller to the off position for your central heating system, turn you room thermostat down to zero and turn your thermostat valves down to zero (rotate clockwise).
Some combi boilers have an option to be either hot water only or heating and hot water. Make sure yours is set to heating and hot water.
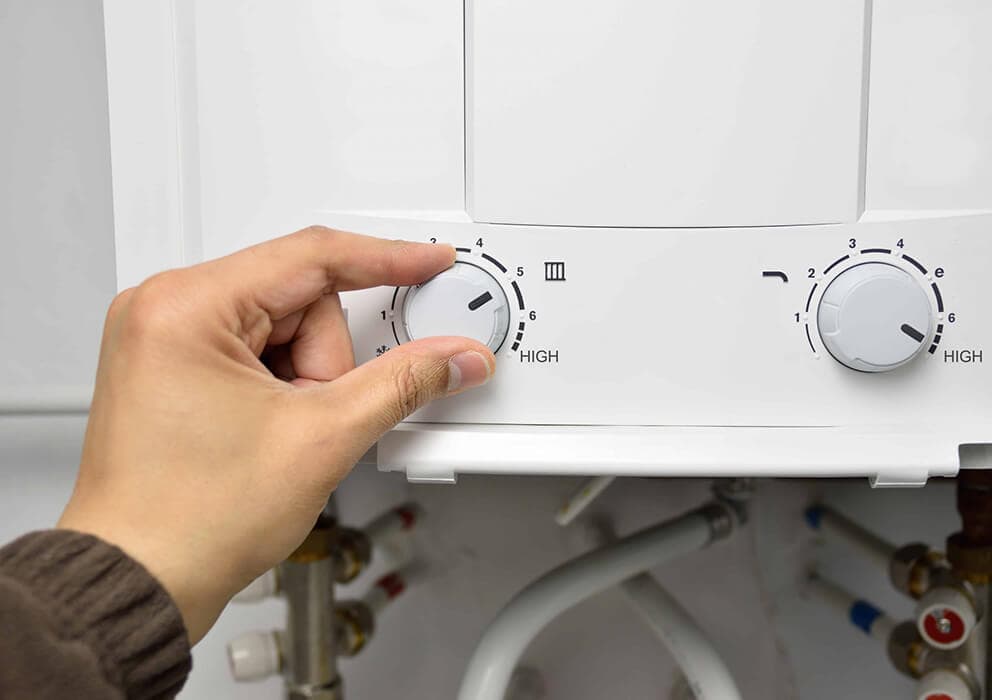
Set your boiler thermostat to be maximum at this point.
let’s take a look at your time controller. We need to make sure that your time and dates are set correctly and that your programmed times for it to come on and off are also set to the times you desire. Maybe your living habit has changed since last winter.
Lets switch your time controller to be on, because we turned the room thermostat down the boiler should not be told to come on at this point.
The room thermostat plays a massive part in keeping your gas bills down, it’s surprising how many people use theirs incorrectly, so just to confirm, turning your room thermostat up to 30 degrees will not make your house heat up quicker! So if you’re one of the people who does this STOP! Put the thermostat down and observe.
If your reading this and it’s still September then your internal rooms are going to be roughly 21-22 degrees so we’re going base the following numbers on this time of year. Currently as I write this it’s 20 degrees outside and my internal rooms are 22 degrees.
If you turn your thermostat up you should here a clicking sound (most traditional ones do anyway, other brands may have some type of indicator to make you aware that a demand for heat has been made – read your user guide if you’re unsure.)
The click/demand indicator should be clicking at roughly 21-22 degrees, if its clicking at 16 degrees or 28 degrees then there’s a good chance your thermostat needs to be replaced.
Let’s keep it down to zero for now, we’ll come back to the room thermostat in a second.
Also known as T.R.V’s, these were a great invention to help manage the temperature in each room. Unfortunately they have been superseded by modern advancements in technology but i’m not here today to preach about why I love weather compensation or modulating control systems, there’s a whole dedicated section about that so we’ll swiftly move on.
Thermostat valves are designed to turn the radiator off when a room reaches the temperature you’ve set it to. So for example number 3 is typically 18 degrees and number 4 is typically 22 degrees.
These have probably been stuck in the 22 degree position for the last month or so and are probably stuck there. Hopefully turning them down to zero has freed them up again.
The best way to check if these are working as well as they should be is like this – we know the room is roughly 22 degrees, so if we set them to be number 3 in theory they will be in the off position.
In a second we’re going to turn our room thermostat up to maximum, which should tell the boiler to fire up for heating. Our thermostat valves should be off meaning that the radiators shouldn’t get warm. If you turn the T.R.V’s up to 4 they still might not come one, and if we turn the T.R.V’s up to maximum then they should come on.
If they don’t then then you might an issue with the valves or there could be an issue with the circulation of the heating system water. In which case you might want to consider calling an engineer out to investigate further.
First of all, before we do anything, I’m going to open all of my windows to allow the heat to dissipate out of the house. You’d be surprised how hot your houses gets when its so warm outside.
Let’s go and turn our room thermostats up to maximum, this is going to confirm that the components within the boiler are operating the way should be and the heat should be dispersed through into the radiator circuit.
Go to the boiler and double check that the our pressure is still where it was earlier on. While you’re there I’m going to be listening to the moving parts, are they sounding a little louder than they used to? Does it sound like it grinding away and struggling to do its job?
Over the years I’ve developed an ear for this so I can appreciate it could be difficult for someone who hasn’t got the experience I have to hear the difference. If you’re unsure get your trusted heating expert in to take a look for you.
This is also a really good opportunity to look out for any signs of water, a silent leak can cause boilers to be unsafe so keep you eyes pealed for rusty spots on any of the valves or on the floor.
If you notice that the pressure in the system is rising, don’t threat. This is typical when the boiler heating is on, the water inside the system is expanding which causes the water pressure to increase. This can typically rise from between 0.5 – 1 bar.
If your boiler pressure is increasing up to 3 bar then you could have an issue so now would be a good time to call your engineer, before winter arrives and you really need the heating to be in tip top shape.
Now we can run round and open the T.R.V’s up to maximum to see if they come on, I would recommend starting from a radiator which is furthest away from the boiler. This helps push the water in that direction to remove any trapped air etc.
Once they are all open, are all of your radiators getting hot? Is there any signs of leakage by the valves etc?
Now we wait, we want the boiler to reach its maximum temperature so we know it can go through its full cycle without locking out or over pressurising. Once the flame has gone out it’s a good idea to let it run for a bit longer until it fires up again. This is proving to me that the boiler can fully complete its job of keeping your house warm.
If you’re confident with tools and a keen D.I.Y’er then its definitely a good idea to check the water quality of the central heating system.
Simple way to do this is to-
Hopefully you have water that looks good enough to drink (don’t drink it!), if not then you could have a corrosion issue. Corrosion is fatal to boilers, it contaminates vital parts which then become blocked or seize up.
Colours can range from orange with no visible particles, to black and sludgy with obvious visible particles. Different colours mean different things so this is the point where you need an expert. At least you caught it before it caused permanent damage.
If you have a condensing boiler I would recommend you read our ‘What is a condensing boiler and how can I maximise its efficiency’ post, as its way more in depth than this. But for the purposes of this post here’s some useful tips to ensure your taking advantage of possible gas savings.
The boiler thermostat setting is a tough one to set correctly, every day is different, if it’s -4 degrees outside then you’re going to need it higher than  what you would if it was 10 degrees outside. By setting your boiler thermostat too high the radiators are going to get too hot and when the room thermostat turns the boiler off the radiators will continue heating your room causing you to feel uncomfortably warm. If it’s too low then you simply will never get to the desired temperature.
But by rule of thumb, if it is 10 degrees outside then your boiler thermostat should be set between 45 – 55 degrees. If it’s 5 degrees outside then you might need to might need to increase this to 55 – 65 degrees, If it’s -4 outside, then you’ll need it to be maxed out at between 65 and 80 degrees.
This all depends on how well insulated your house is and other variables. But the lower you can have it and still achieve the temperature you desire the less its going to cost you.
One of the biggest mistakes I see people make is that they leave the house for 8 hours during winter and completely turn the system off! This causes the internal temperature to plummet to 12/14 degrees. When they come home they wonder why it takes so long to heat the house up to their desired temperature.
To cut a long story short your bricks that your house is made of acts as a thermal store. They actually hold the heat and bounce it back into the room. If the walls are 12 degrees, then they’re going to absorb the heat you’re creating so it can store it up again. Keeping your internal temperature no lower than 18 degrees will help your bricks stay close to the temperature you desire so you can feel the benefit quicker and also maintain the temperature for a longer period without the need of the heating system to back on for a while.
So leave your time controller set to on, and set the thermostat to 18 before you walk out of the door. Trust me.


